It’s time for part 3 of our Tamiya Grand Hauler kit build. For the first two installments of this build, we covered chassis and axle assembly. In this portion of the build, we will cover installing the rear axles and dig into the amazing three speed transmission that comes with this kit. It doesn’t get much cooler than being able to shift gears on the fly with an R/C car! Let’s dive in!
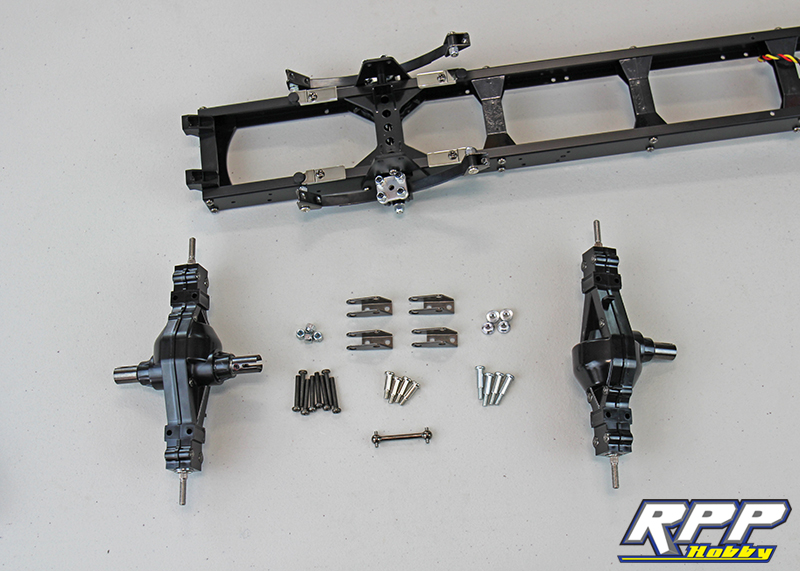
Find page 10 in the build manual and locate step 18. Here you can see everything required to install the rear axles.
As we started the install we used a small c-clamp to hold the chassis securely in place.
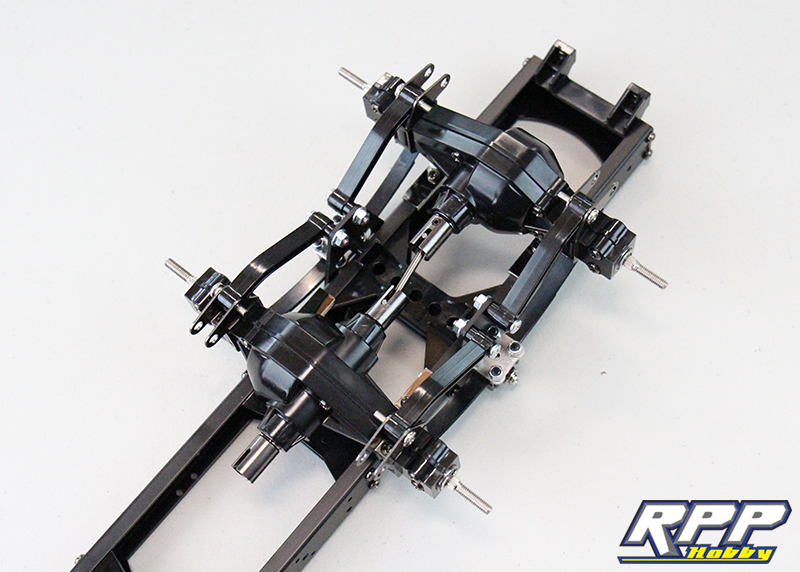
Start by attaching the axles to the leaf springs with the supplied brackets, hardware and thread lock.

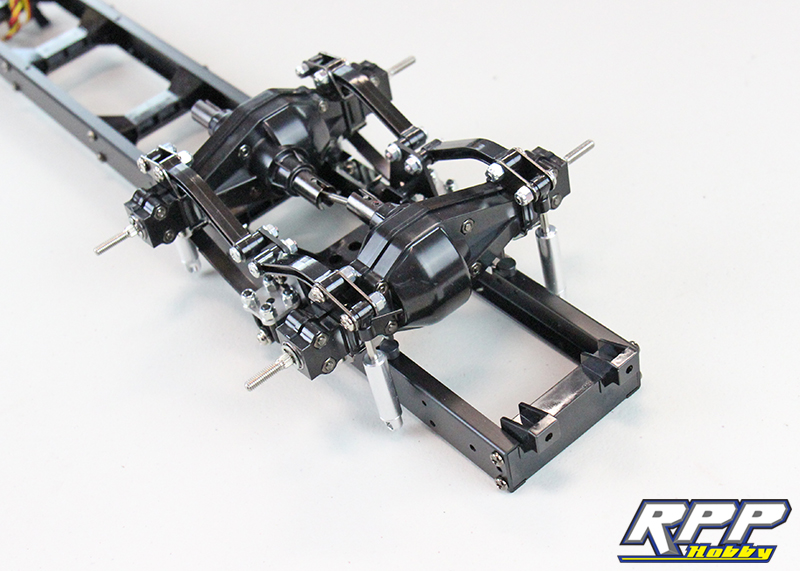
Install the lower arms and stubby driveshaft next. Don’t forget the thread lock on the shoulder bolts for the suspension arms.
Everything required to install the shocks per step 19.

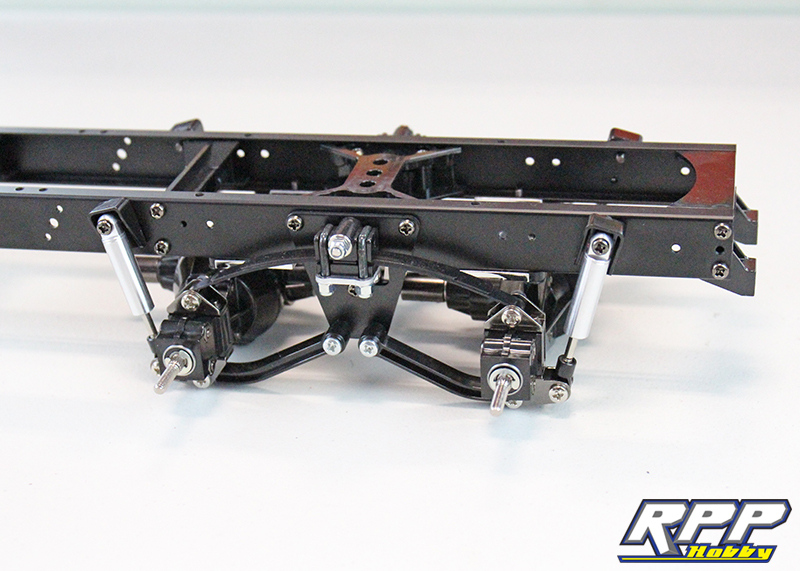
We bolted up the lower shock mounts first.
Once the lower mounts are secure, flip the chassis over and install the upper shock mounts.
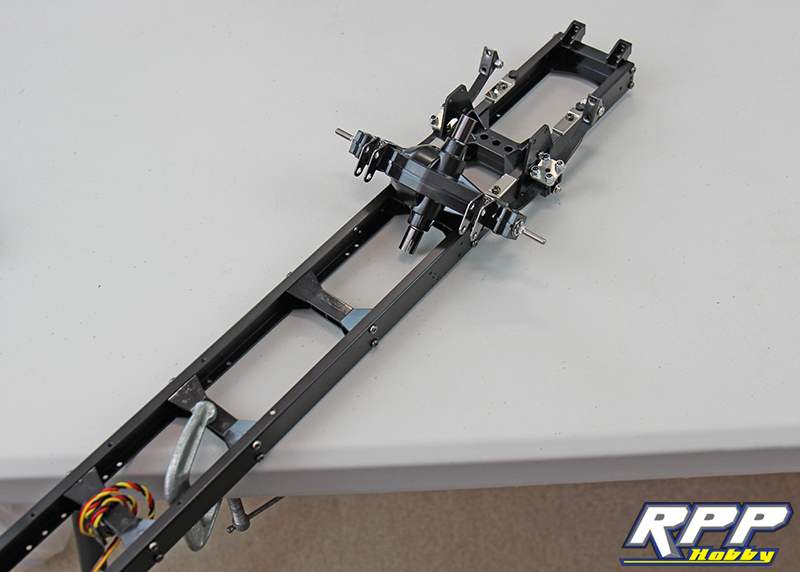
Now that the chassis, suspension and axles are assembled you can see how big this rig is going to be! The RPP Hobby banner measures approximately 26 inches long.

Now it is time to move on to building the three speed transmission. This transmission is definitely one of the most intricate on the R/C market because of its ability to shift on the fly through three gears from the transmitter. Starting with step 20, locate all the parts required to build the shift fork assembly.

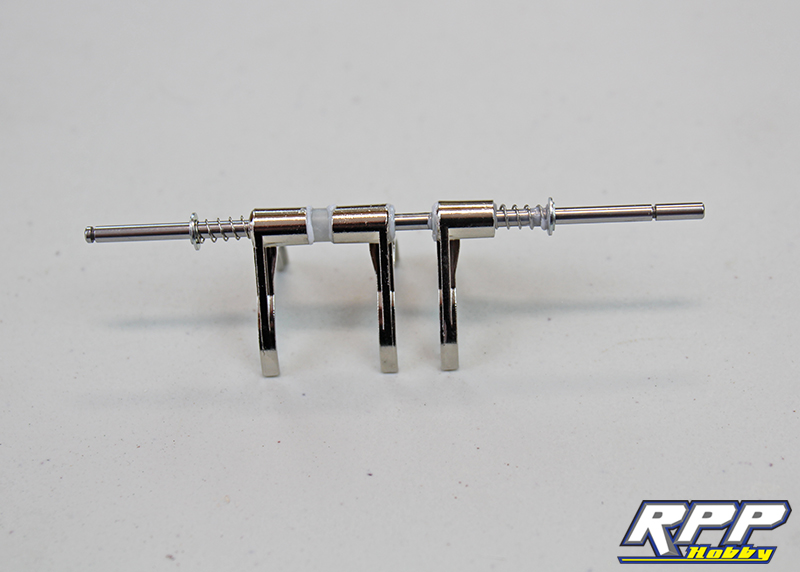
Note the direction of the shift forks, and the shifting rod, as you start the assembly.
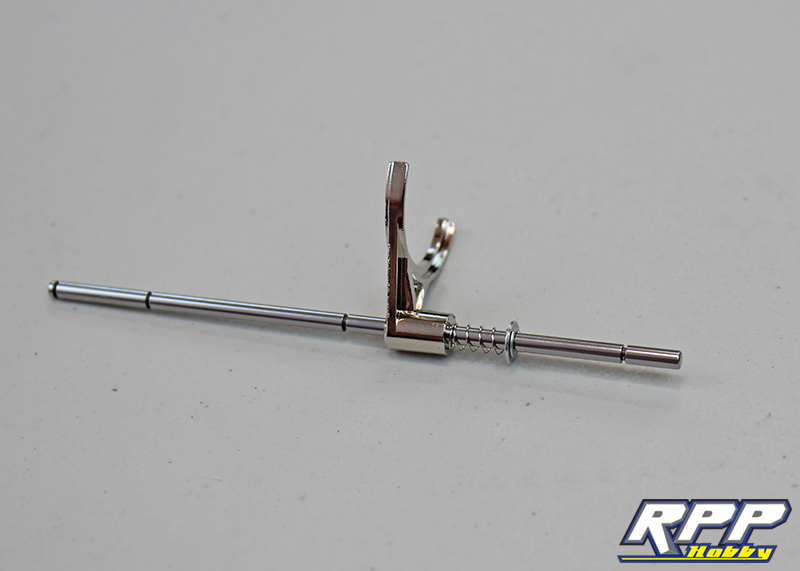
Shift fork assembled! Don’t forget the grease the sections of shaft that the shift forks slide along.
Everything required to complete the second half of step 20.

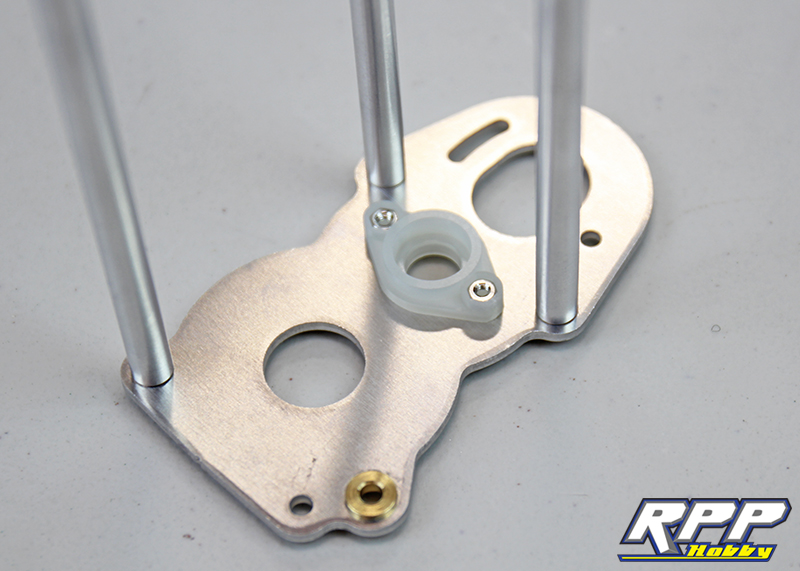
Attach the transmission plate stays to gearbox plate A. Then, set the M2 nuts in place and secure the clear plastic bearing race to the motor plate.
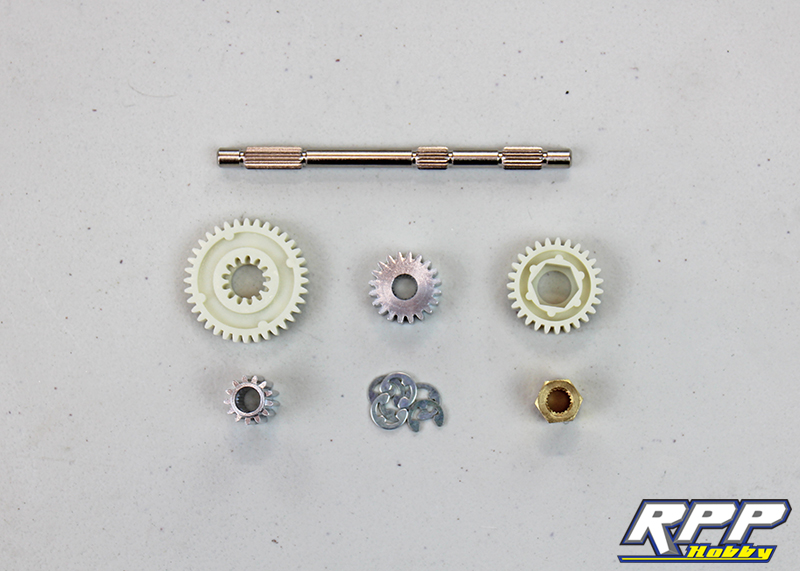
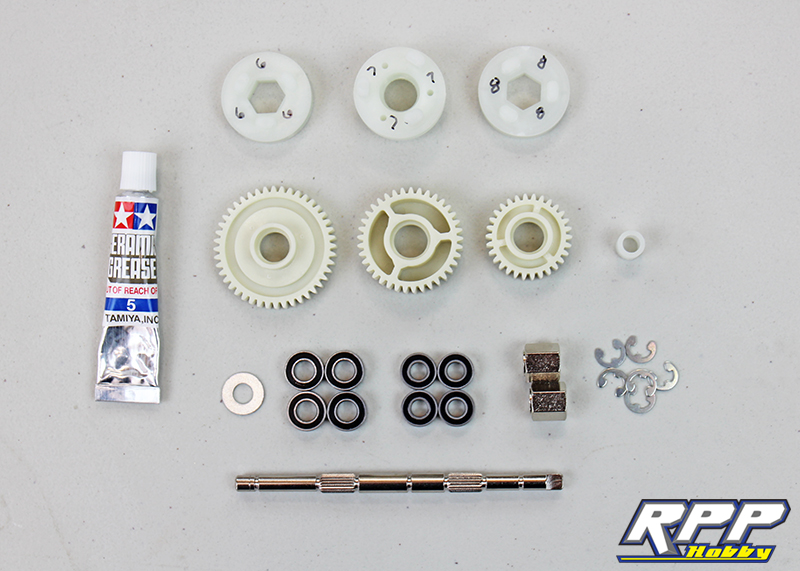
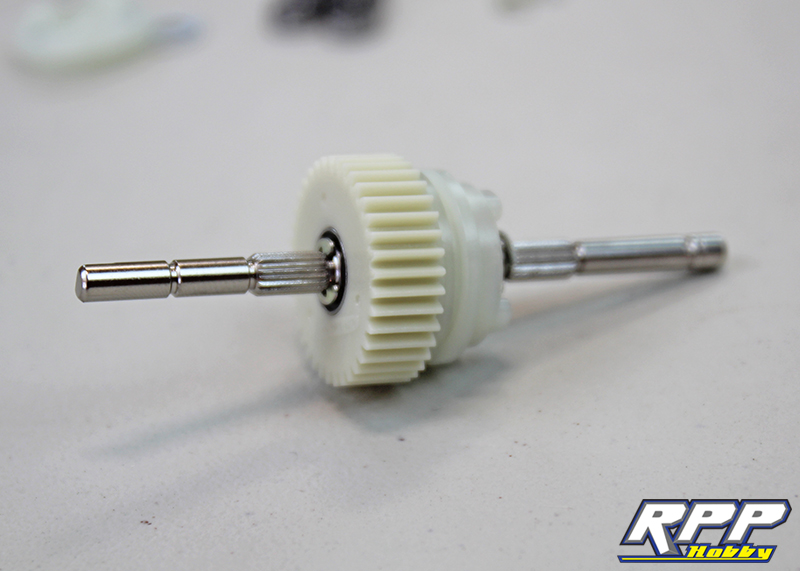
Step 21 shows how to assemble gear shaft A. Everything needed to complete that step.
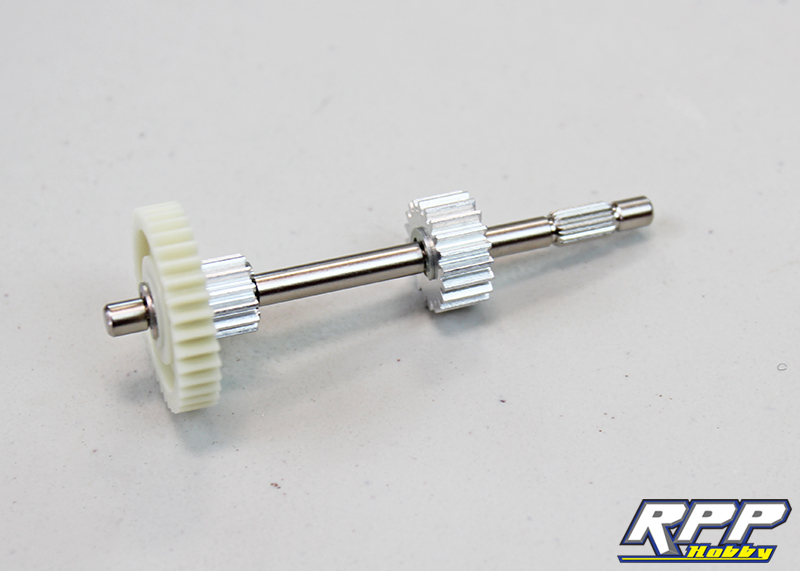
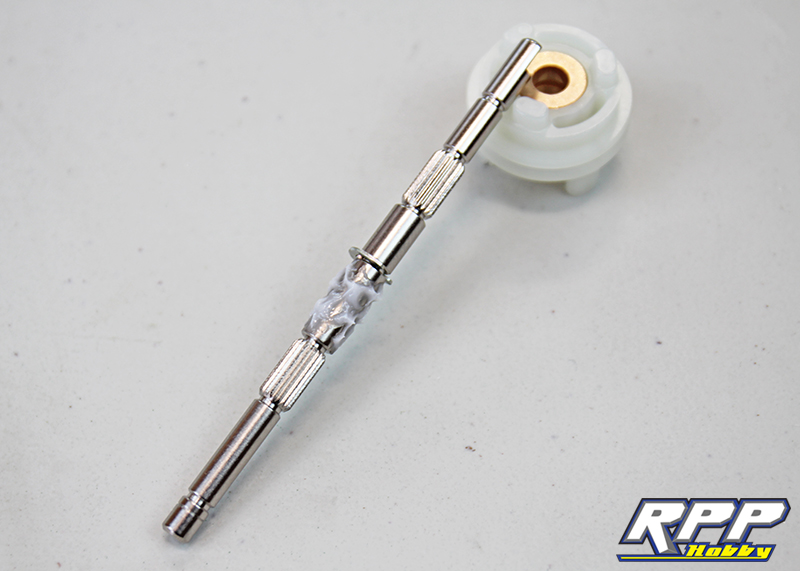
Snap the first e-clip in place to attach the 13t metal gear and the 36t plastic gear. Note the direction of the shaft to ensure it is oriented properly. Then, snap the second e-clip into place to hold both gears together.

Install the 20t gear next in the center of shaft A with the supplied e-clips.
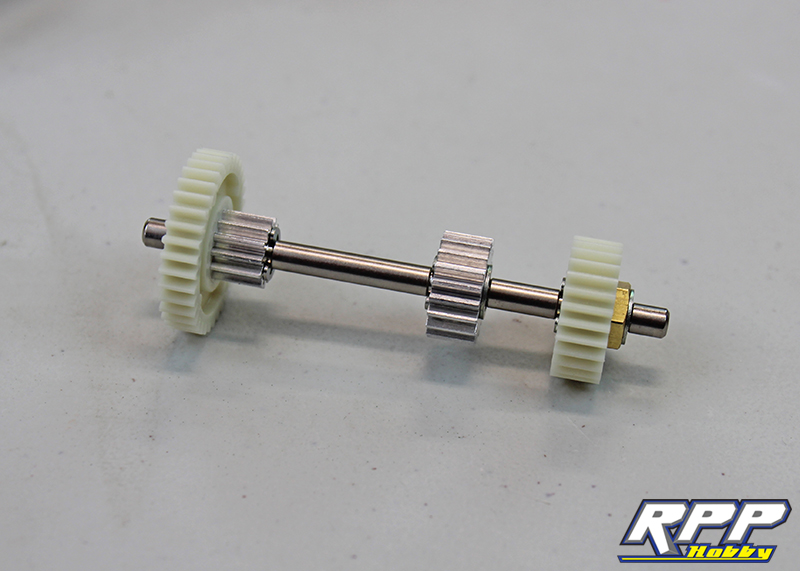
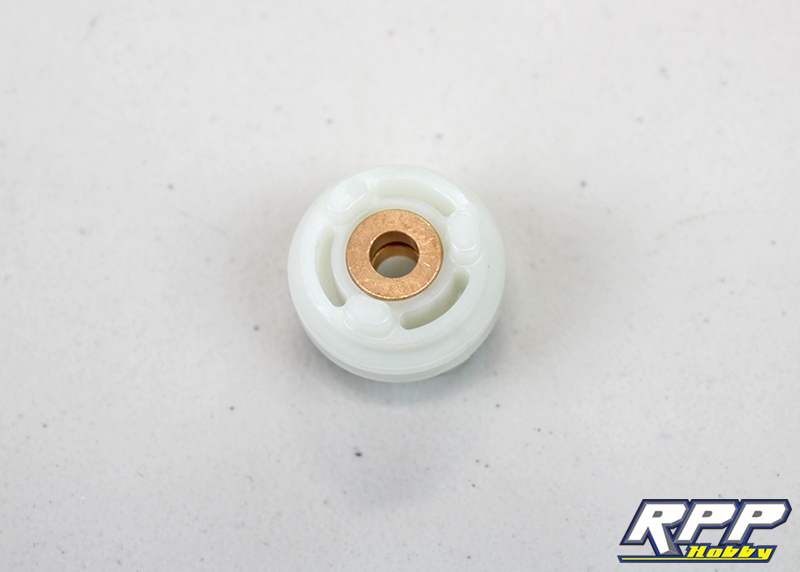
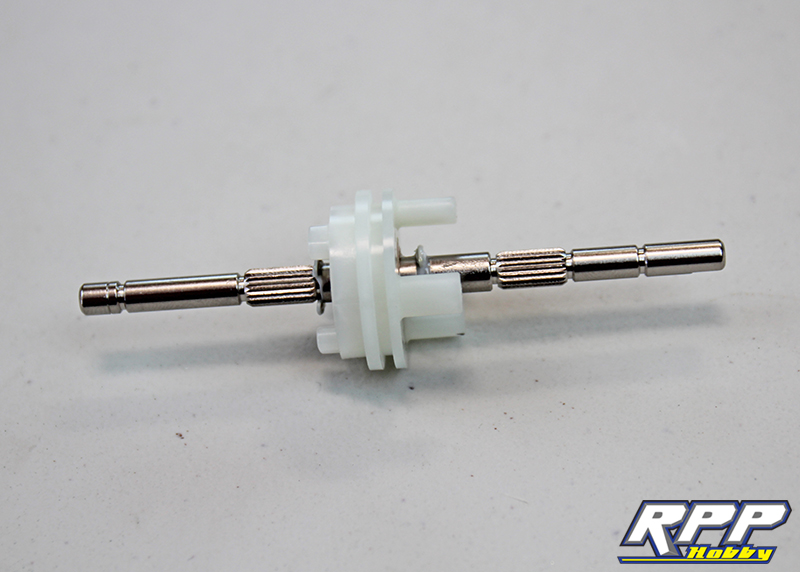
Slide the gear hub and 27t gear into place and secure with the 4mm e-clips. Make sure the brass hub and gear are facing the proper direction.
Step 22 and building gear shaft B. All the parts required. Notice here we labeled the the white plastic shift cogs that ride on the shift forks with their part numbers. It is fairly easy to identify the parts in the manual, but this just makes things easier during assembly to ensure the right parts go in the right places.
Start by pressing the proper bushings into shift cog J7. If you bought bearings to upgrade all of the factory bushings make sure you still use the bushings here. This shift cog has to slide around freely on the gear shaft. A greased bushing is a better tool for the job here than a bearing. A bearing used here will most likely bind when you try to shift the trans.
Snap a 4mm e-clip into the proper slot on shaft B and grease the section of shaft that the shift cog will slide along.
Slide the shift cog into place and snap the second e-clip onto the shaft. Notice there is play and the cog slides back and forth along the shaft to function properly.
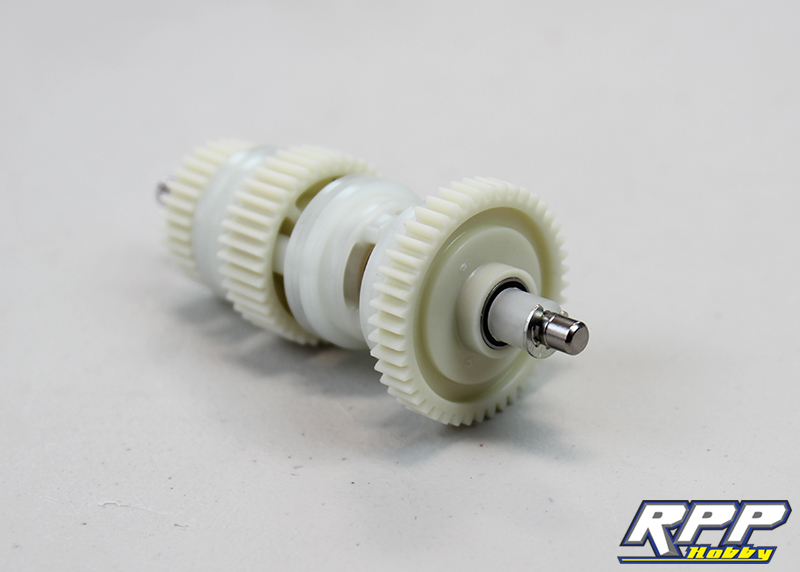
Install the proper bearings into the 37t gear and install it onto shaft B.
Since we were already working on this end of the shaft, we kept on going. Install the long gear hub next, then shift cog j6. Install the bearings into the 30t gear, slide it onto shaft B and secure with another 4mm e-clip.

Flip the shaft around and install the single flat washer up against the e-clip holding shift cog J7 into place.

Slide the gear hub into place. Now it looks like you are suppose to try and squeeze an e-clip on the backside of this gear hub, but you are not, even though there is a groove there. The e-clip on the very end of the shaft will hold everything securely in place.
Slide shift cog J8 onto the gear hub. Install the bearings into the 44t gear and slide it into place as well. Install the J5 spacer and the last 4mm e-clip. Gear shaft B done!
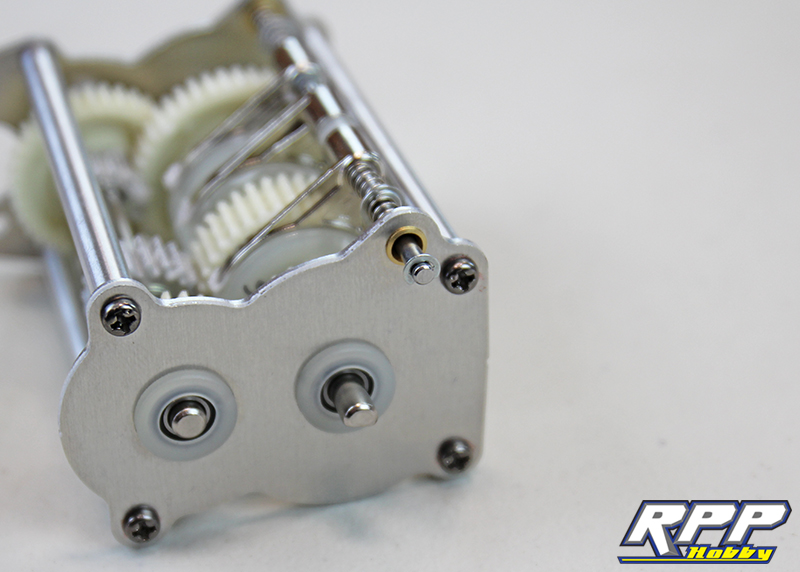
Next we assembled the transmission per step 23, minus the grease. We did this because it keeps everything cleaner during the build process and we have plenty of room to grease the gears and shift forks after assembly. Make sure all 3 shift forks are in their respective grooves on the corresponding shift cogs. Don’t forget the thread lock on the transmission plate screws too.
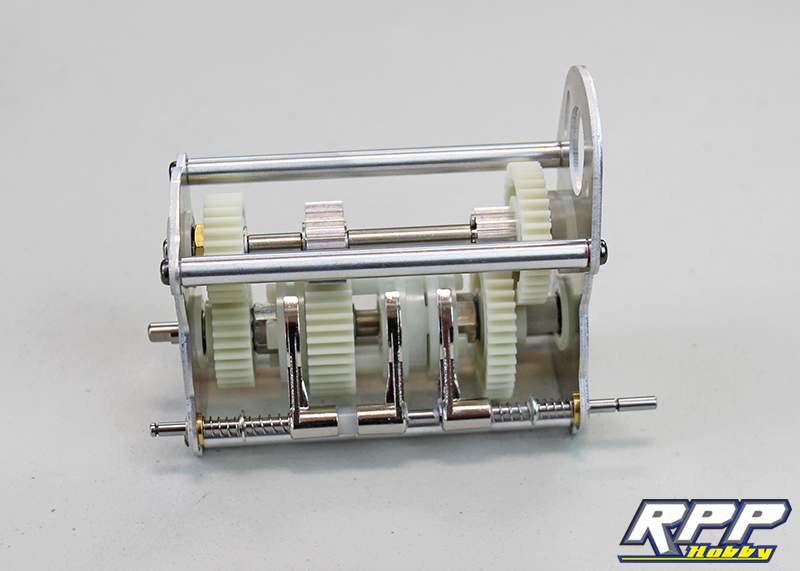
Once everything is in place and functioning properly, we went ahead and applied a thin coat of grease to the required areas. Tight to reach spots can be hit with a toothpick with a dab of grease on the end. We did not grease the 36t spur gear on the upper shaft that the motor pinion will ride on.

Here is a short video of the transmission shifting though it’s gears from 1st, to 2nd, to 3rd and back to first again.
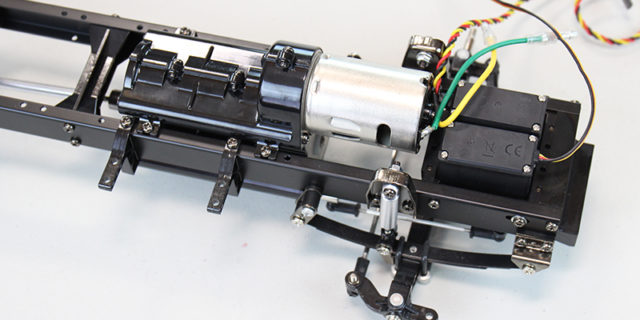
Time to install the motor and finish up the shift linkage.

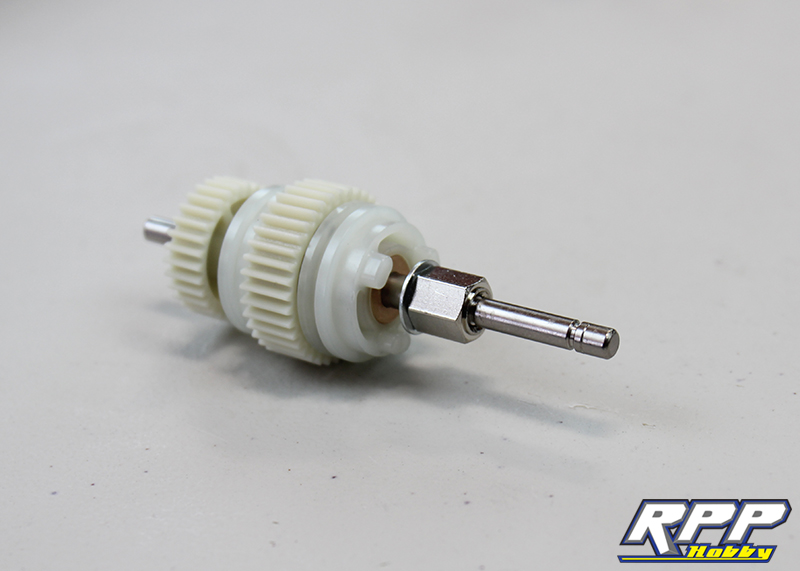
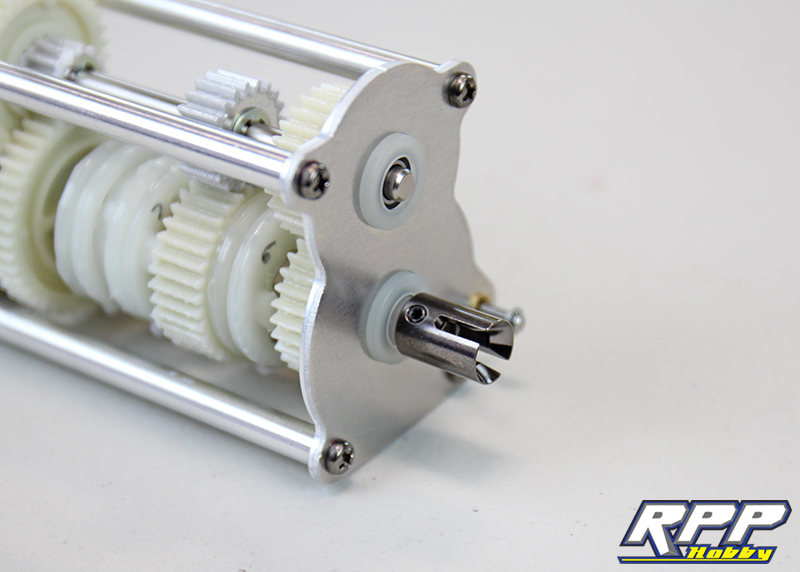
Install the small e-clip on the output side of the transmission.
Snap the second e-clip in place and install the shift collar. Don’t forget the thread lock on the collar.

Slide the J4 spacer onto the transmission output shaft.

Install the joint cup next, apply a dab of thread lock to the set screw before tightening the cup into place.
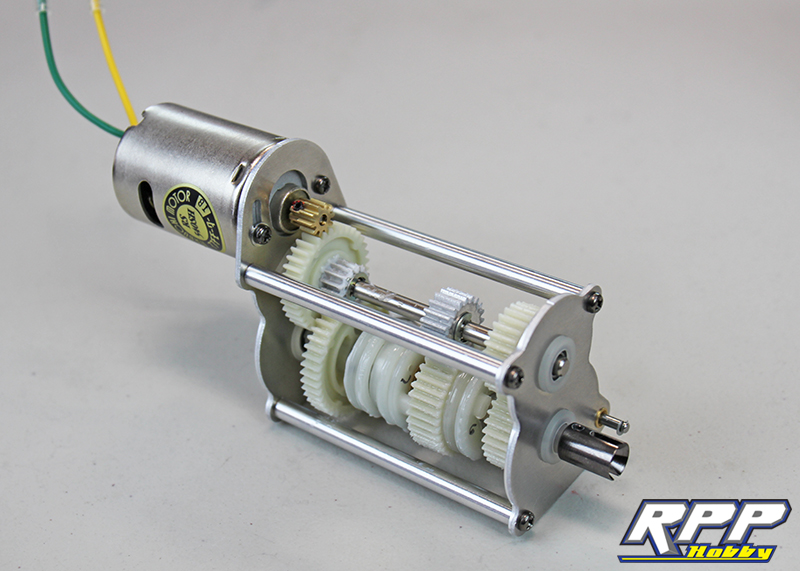
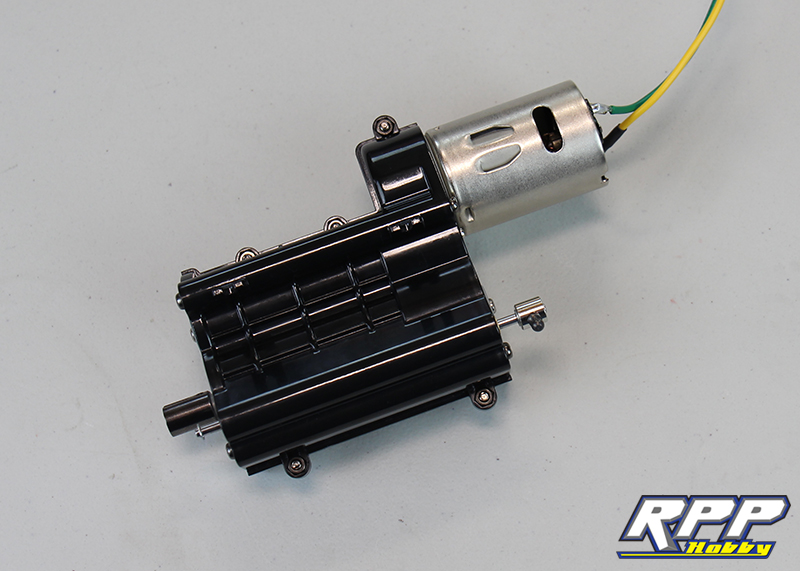
Install the motor plate pad onto the motor, slide the motor into place and loosely tighten the motor mounting screws. Install the pinion gear next making sure it lines up properly with the spur gear. Rotate the motor down to set the gear mesh and secure the motor mounting screws. Once the motor is tight you should have just a tiny bit of play in the pinion and spur gear for proper gear mesh.
Time to button this three speed transmission up!
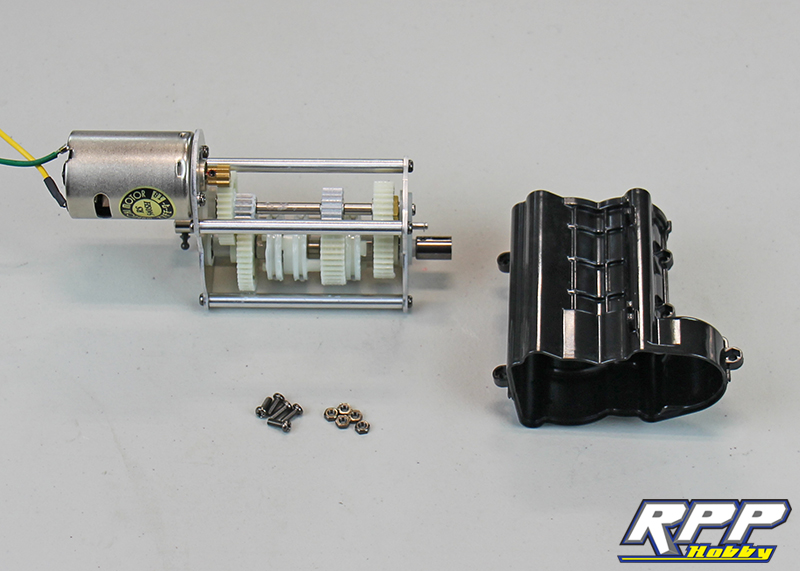
Snap the transmission case into place and secure with the supplied hardware.
And last, but not least, we will install the transmission and driveshaft into the chassis, then attach the shift servo to the shift collar on the transmission. Step 26 complete!

That does it for part 3 of our Tamiya Grand Hauler kit build. Tune in next time as we see we may have to get into painting this rig as we move forward with the instructions. Hmmm, what color should we use? Thanks again for checking out the RPP Hobby blog!