
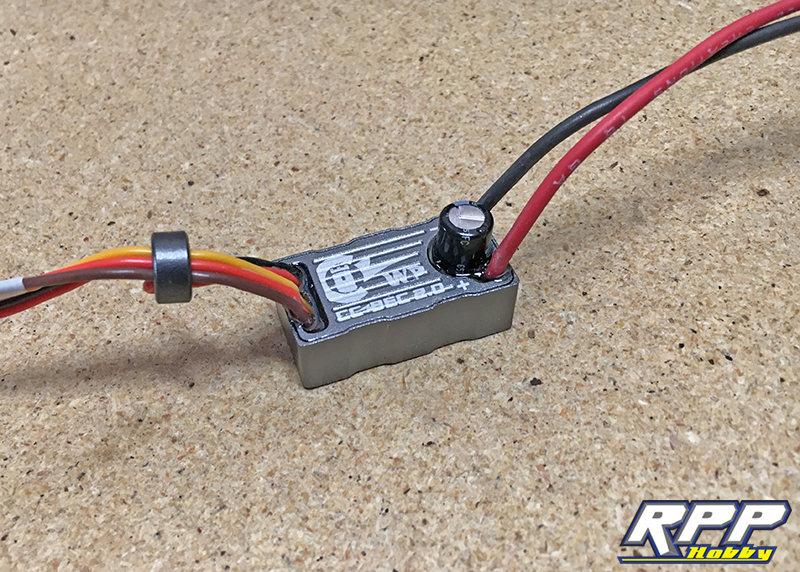
Does your ESC stall out in hard binds with your high torque steering servo? Wish you had a little more power in your steering set-up overall? Castle Creations has just the part you need to solve your steering woes. One of the most common problem when running a high torque steering servo is the draw on the internal BEC of the ESC in hard binds, especially when running a 3S Lipo. If your internal BEC can not supply the power needed to your servo when steering in technical situations the ESC will most likely go into “limp mode”. When this happens you lose all throttle and steering control until the truck is freed from its binding situation. Installing a Castle Creations CC BEC 2.0 will fix this issue and allow you worry free scale trailing and rock crawling in any situation, even water! This little unit replaces the internal BEC in your ESC with a more robust set-up to liven up even the most power hungry servos on the market, including 5th scale servos. This 2.0 BEC’s voltage can be externally adjusted from 4.75 volts up to as much as 12 volts, depending on the application and batteries used. We left ours set to the factory 5.25 volts to start. Castle does offer a few different versions of their BEC’s, with this one being the top of the line. We also really like the fact that it is fully waterproof. The install is quite simple and the benefits are definitely worth the effort once complete. Let’s dig in and see what it takes!
We will be installing this Castle BEC into an older Wraith kit that recently received a new brushed ESC and motor set-up running a 3s Lipo. Needless to say in any bind with this new set-up and the sticky 2.2 Pit Bull Rock Beast tires everything would shut down until it was retrieved from said bind. The Castle Creations CC BEC 2.0 will fix that!
First thing we did was remove the receiver plug from the three ESC wires. Snap a quick cell phone photo for reference if you are not sure of the order to put them back when you are done.

Use something sharp to gently pry up on the plastic tabs to release the wire leads so they can be pulled out of the plastic connector.

Repeat the above step for all three wires.

Next, fold the red wire back onto the ESC wires and apply some heat shrink tubing to keep the lead in place. Install the remaining wires back into the plastic connector in the proper order.
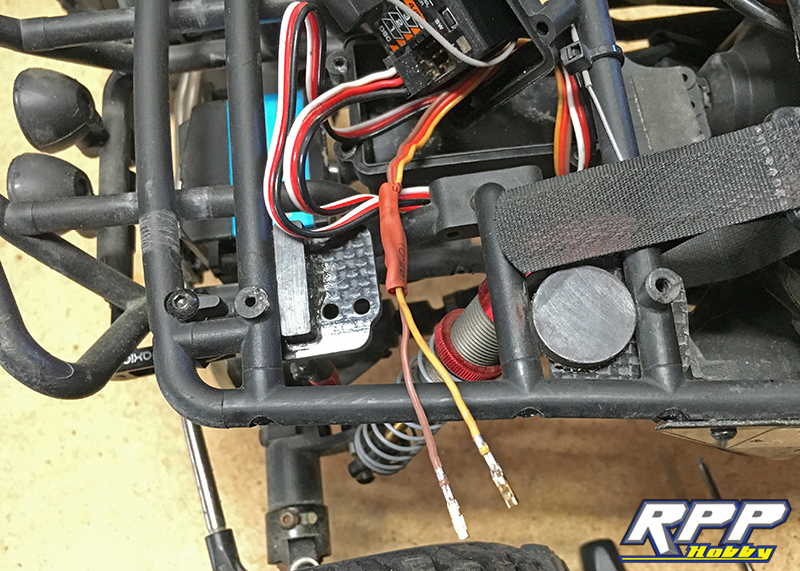
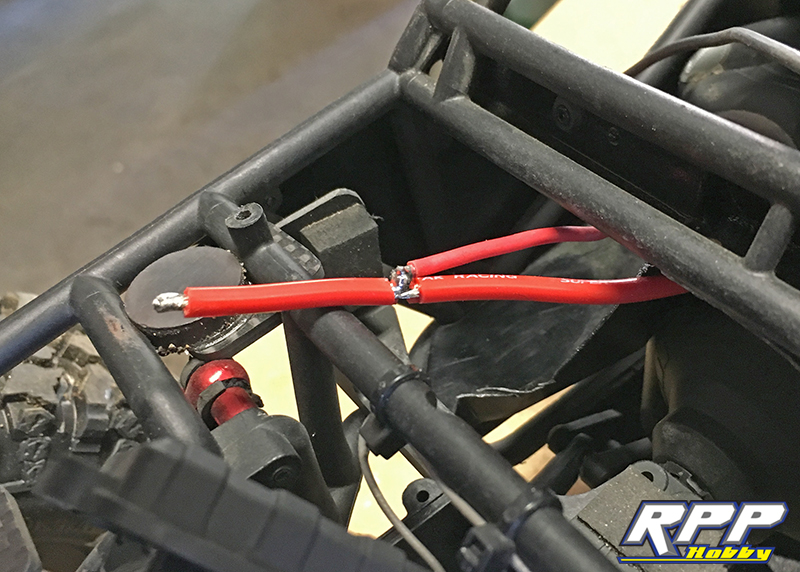
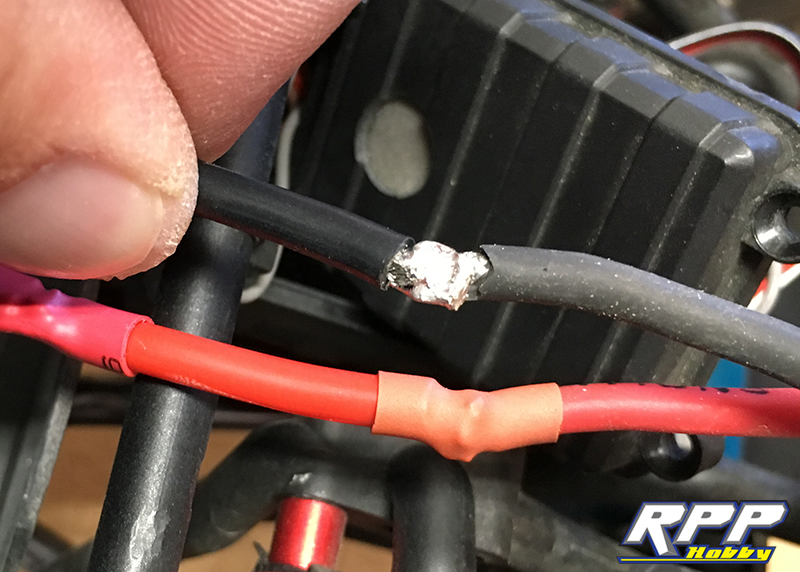
You will need to tap into the ESC’s battery wires with the positive and negative leads of the BEC. We tapped into the positive wire about an inch or so from the end. You can solder the BEC directly to the battery connector too, but it will make the connector a bit bulky, so we use this method instead. We removed our Dean’s battery connector so we can add heat shrink tubing to the joints once soldered. As usual we suggest using a high quality soldering station when installing any electronics that require soldering. The smaller 40 watt soldering irons will struggle trying to generate enough heat to properly join larger wires. Remove a small portion of the wire’s coating with a sharp hobby knife, tin the ESC wires, and solder the BEC’s leads into place.
Add heat shrink tubing as needed.
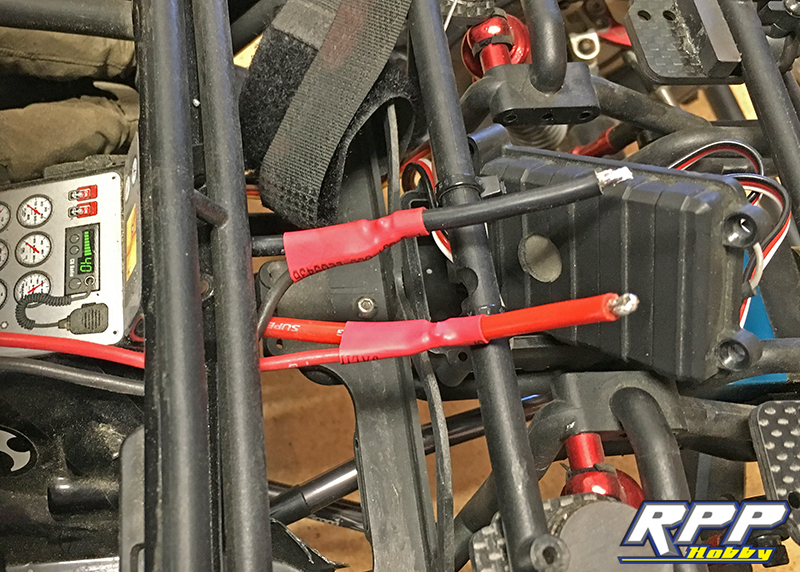
Slide more heat shrink tubing over the wires and solder the battery connector back onto the ESC’s battery wires. We added a little extension on the end of our ESC wires since they were a little short to begin with. To hold the two wires in place while the ESC is still in the vehicle we used 90* needle nose pliers with a rubber band on the handle as a home made “3rd hand”. Once the wires are tinned, sandwich them between the tips of the pliers and hit them with a soldering iron. Don’t forget the heat shrink tubing.
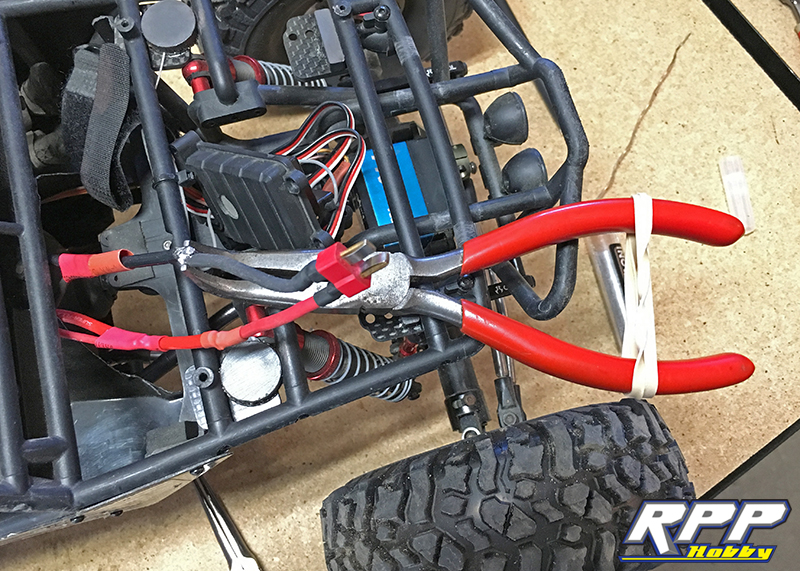
Once the solder is hot the pliers will compress the wires together for a nice strong bond.
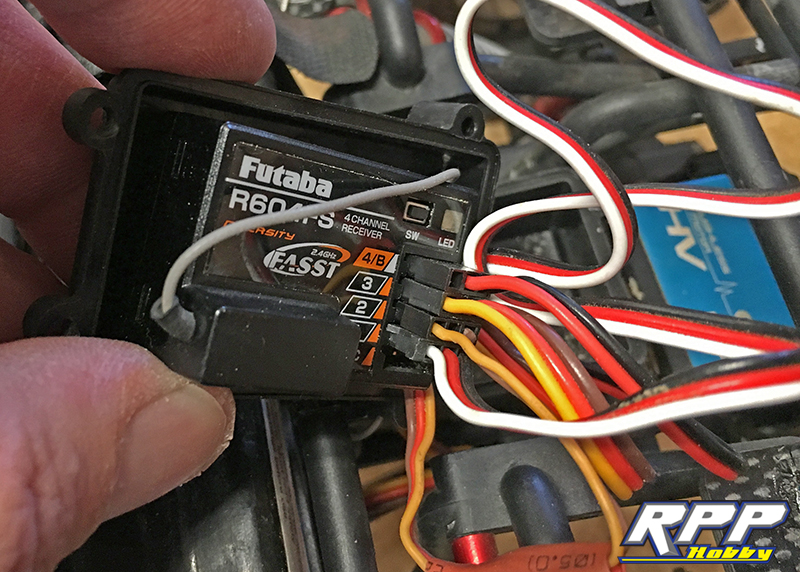
Next, plug the BEC and ESC into the receiver. ESC goes into channel 2 and we plugged the BEC into channel 3 and 4 on our four channel Futaba receiver.
Last thing to do is mount the BEC. Castle suggests that the BEC be mounted away from the ESC and receiver. We chose to mount it on the passenger floor behind the body panel to keep it somewhat hidden.

A quick test run in our home made rock pile instantly showed excellent results. We dropped a front tire in a hole between two big rocks, turned the steering to lock and drove away without issue. Before the BEC was installed the Wraith would have stalled out and gone straight into limp mode. Installing the Castle CC BEC 2.0 made a huge difference in our steering ability in tight binds. Definitely a worthy upgrade for a little money and effort! Thanks for joining us on this install, and be sure to stay tuned for more!
0 Comments
Trackbacks/Pingbacks